
As we step into 2024, the role of Facebook in the E-commerce ecosystem has reached new heights. With over 2.8 billion monthly active users globally, the platform provides an unparalleled opportunity for businesses to tap into a vast and diverse audience.
More than just a social networking site, Facebook has transformed into a multifaceted marketplace, connecting consumers with products and brands seamlessly.
Whether you’re a seasoned E-commerce entrepreneur or just dipping your toes into the online marketplace, this guide is tailored to provide actionable insights and practical tips.
From setting up your Business Manager to crafting compelling shopping ads and navigating the nuances of audience targeting, each section is designed to contribute to the overarching goal – maximizing results with Facebook Shopping Ads.
1. Preparing Your E-commerce Store
Optimizing Product Pages
When it comes to setting up successful E-commerce shopping ads on Facebook, the first crucial step is optimizing your product pages.
This not only enhances the overall user experience but also lays the foundation for effective advertising. Here’s how you can do it:
1. Use High-Quality Images :
Invest time in capturing high-resolution images that showcase your products from different angles. Ensure that the images are well-lit, clear, and accurately represent the color and features of the products.
2. Detailed Product Descriptions :
Write clear and concise descriptions that highlight the key features, benefits, and specifications of each product. Address common customer questions in your descriptions to streamline the buying process.
3. User-Friendly Navigation :
Optimize your website’s navigation to make it easy for visitors to find what they’re looking for. Clearly categorize products, implement a search function, and create a logical flow from landing on the site to completing a purchase.
2. Facebook Business Manager Setup
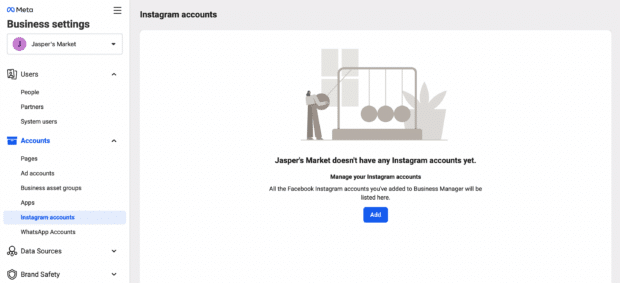
Setting up a Business Manager account on Facebook is the first crucial step towards managing your E-commerce ads efficiently.
Step 1: Navigate to Business Manager
Begin by going to the Facebook Business Manager website (business.facebook.com) and click on “Create Account.” If you already have a personal Facebook account, you can use that to log in.
Step 2: Provide Business Details
Once logged in, click on “Create Account” in the top right corner. Fill in your business details, including the business name, your name, and your business email.
Step 3: Add Your Business Page
If you already have a Facebook business page, you’ll be prompted to add it to your Business Manager during the setup. If not, you can create one or request access to an existing page.
Connecting Your E-commerce Website to the Business Manager
Now that your Business Manager account is set up, it’s time to link it to your E-commerce website.
Verifying Your Domain
Verifying your domain is a critical process to ensure that your ads are delivered correctly and that you have control over the content associated with your business.
Section 3: Setting up E-commerce Ads on Facebook
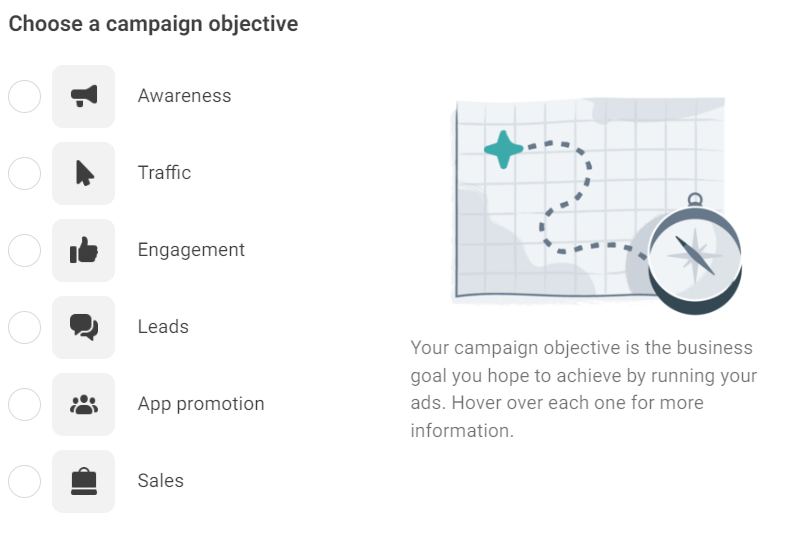
Choose your Objective
Conversions:
Objective: Optimize your ads for actions that matter most, such as purchases.
Why it Matters: Ideal for E-commerce businesses looking to drive sales and maximize return on ad spend (ROAS).
Catalog Sales:
Objective: Promote products from your catalog to generate sales.
Why it Matters: Tailored for E-commerce, allowing you to showcase and sell multiple products within a single ad.
Traffic:
Objective: Send people to your website.
Why it Matters: Useful for driving traffic to specific product pages or your online store.
Choosing the right conversion location is pivotal for E-commerce success on Facebook. This location represents the specific action you want users to take, such as making a purchase.
B. Ad Placement and Budget Optimization
Select the Conversion Location
Choosing where you want to drive conversions is crucial for optimizing your E-commerce campaign. Options include:
- Website: Directs users to make a purchase on your website.
- App: Drives users to download and engage with your E-commerce app.
- Messenger: Facilitates transactions directly through the Messenger platform.
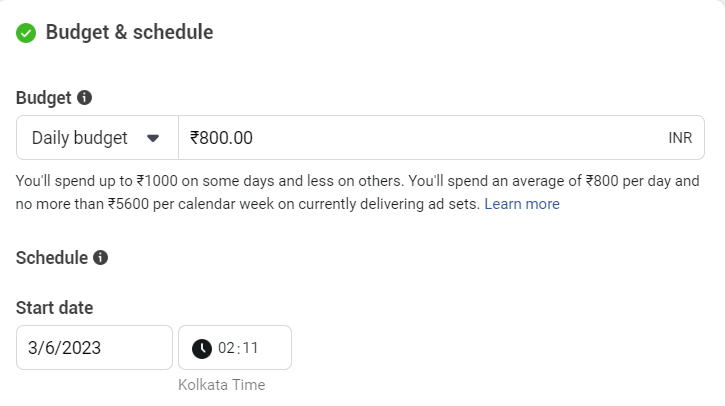
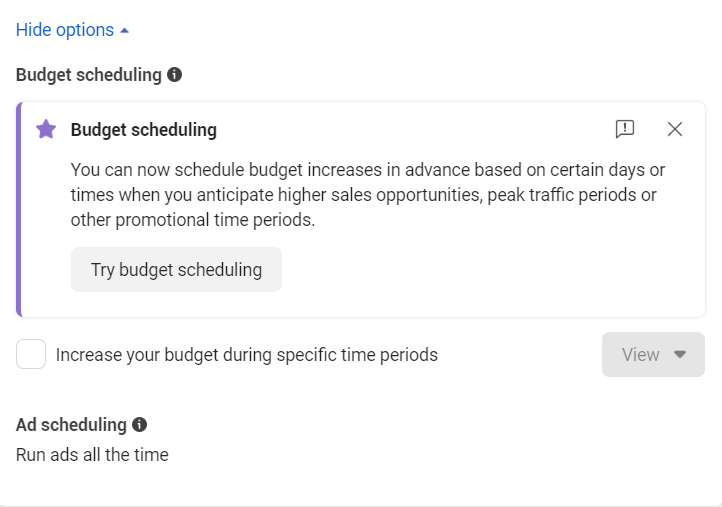
Setting a budget is a vital aspect of your E-commerce advertising strategy. Here’s how to approach it:
Daily or Lifetime Budget: Decide whether you want to spend a certain amount per day or over the entire campaign.
Bid Strategy: Choose between a ‘Lowest Cost’ bid strategy for automatic optimization or a ‘Target Cost’ to control costs more closely.
Tip: Start with a modest budget, analyze performance, and adjust as needed.
Understand the Advantage+ Audience Option :
Advantage+ Audience is a powerful feature for E-commerce businesses:
What is Advantage+: It allows you to extend your reach by showing your ads to people who are more likely to convert.
Why It Matters: For E-commerce, this can enhance your ad’s visibility among users who are highly likely to make a purchase, maximizing the impact of your campaign.
Tip: Leverage Advantage+ to target a more receptive audience, potentially improving your conversion rates.
Advanced Targeting Strategies
Creating Custom Audiences Based on Customer Behavior
One of the powerful features of Facebook advertising for E-commerce is the ability to create Custom Audiences, allowing you to target users based on their interactions with your website or products. Here’s how to make the most of this feature:
Website Visitors: Start by targeting users who have visited your website. Set up a Custom Audience that includes people who have visited specific pages or taken specific actions on your site, such as viewing a product page or completing a purchase.
Engagement: Leverage engagement data to target users who have interacted with your Facebook content, such as liking, sharing, or commenting on your posts. This ensures your ads reach people who have already shown interest in your brand.
Email Subscribers: If you have an email list, upload it to Facebook to create a Custom Audience. This allows you to target your existing subscribers and reinforce your brand message.
Expanding Reach with Lookalike Audiences for Prospecting
Once you’ve created Custom Audiences, take it a step further by using Lookalike Audiences. This feature helps you find new potential customers who share similarities with your existing audience. Here’s how to use Lookalike Audiences effectively:
Seed Audience: Choose a well-performing Custom Audience as the seed for your Lookalike Audience. Facebook will then identify commonalities and find users who resemble those in your original audience.
Location and Size: Specify the geographical location and size of your Lookalike Audience. Experiment with different audience sizes to find the right balance between reach and relevance.
Regular Updates: Refresh your Lookalike Audiences periodically, especially when your customer base evolves. This ensures that you continue to target the most relevant potential customers.
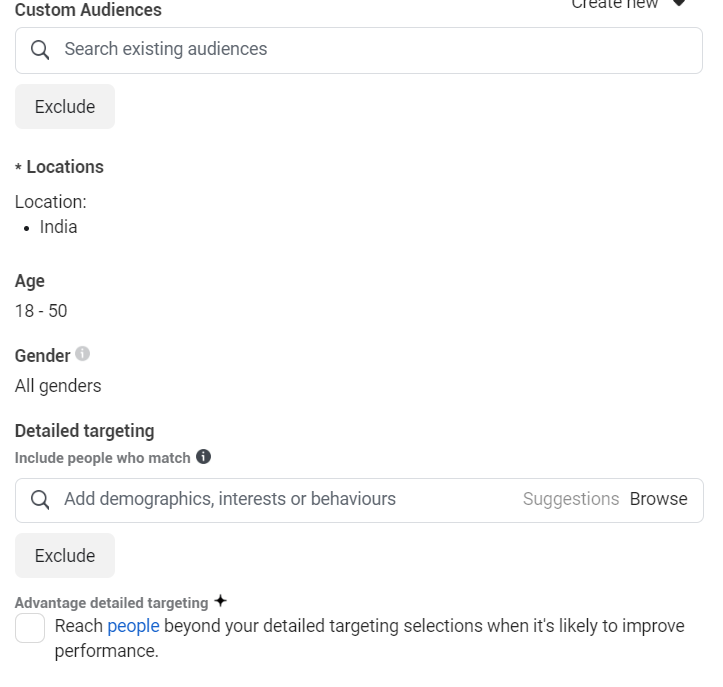
Utilizing Detailed Targeting Options
Exploring Demographics, Interests, and Behavior Targeting
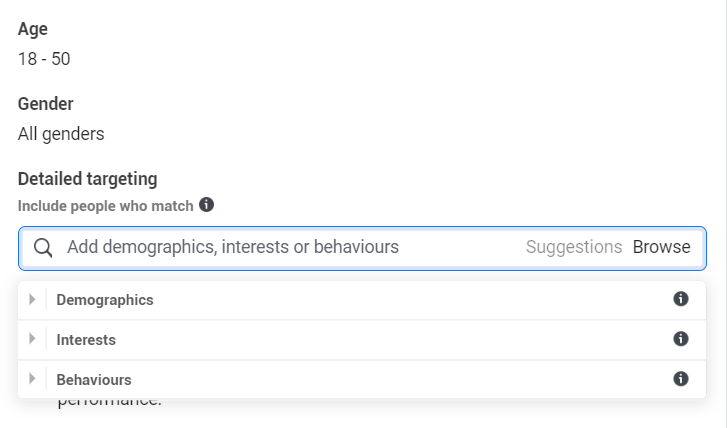
Facebook provides a wealth of targeting options beyond Custom and Lookalike Audiences. To fine-tune your audience for precision targeting, explore demographics, interests, and behavior targeting:
Demographics: Define your audience based on characteristics like age, gender, education, and job title. This is particularly useful when you have a clear understanding of your target customer persona.
Interests: Target users based on their interests, hobbies, and activities. This could include everything from specific brands they like to activities they engage in, helping you reach people with a genuine interest in your products.
Behaviors: Consider targeting based on user behaviors such as purchase history, device usage, and travel patterns. This allows you to tailor your ads to users with specific buying behaviors.
Combining Targeting Options for Precision
The true power of Facebook advertising lies in combining different targeting options to create highly precise audience segments. Here’s how to do it:
Layered Targeting: Experiment with combining demographic, interest, and behavior targeting to create layered audiences. For example, target women in a specific age group who have shown an interest in fitness-related activities.
Exclusion Targeting: Refine your audience further by excluding certain demographics, interests, or behaviors. This ensures that your ads reach the most relevant users while avoiding those who may not be interested.
Testing and Optimization: Don’t be afraid to A/B test different audience combinations to identify what works best for your E-commerce business. Regularly analyze the performance of your ads and adjust your targeting strategy accordingly.
Crafting Effective Shopping Ads
Ad Creative Best Practices
Designing Eye-Catching Visuals for Products
When it comes to designing eye-catching visuals for your products on Facebook, it’s essential to prioritize clarity and visual appeal.
Use high-resolution images that showcase your products from different angles. Ensure that the images align with your brand aesthetics and evoke a positive emotional response.
Writing Compelling Ad Copy that Highlights Product Benefits
Focus on communicating the unique selling points and benefits of your products. Use clear and concise language that resonates with your target audience. Highlight how your products solve a problem or fulfill a need. Incorporate a call-to-action (CTA) that encourages users to take a specific action, such as “Shop Now” or “Discover More.”
Utilizing Carousel and Collection Ads
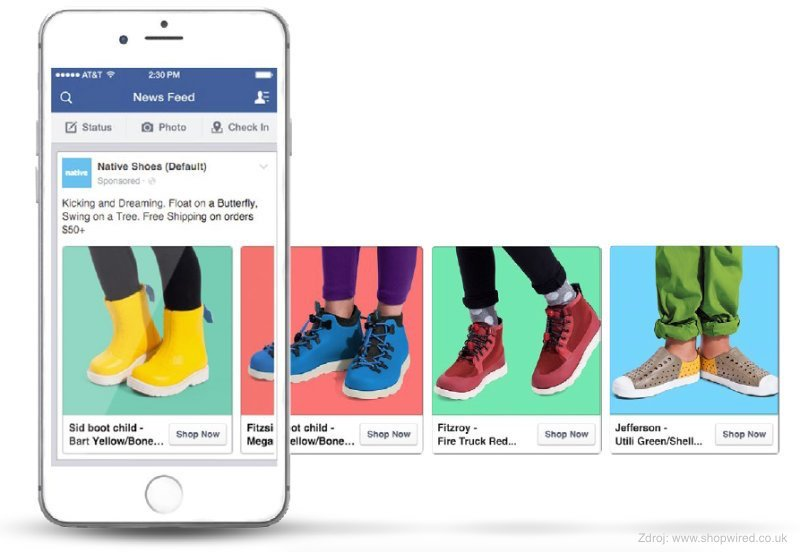
How to Leverage Carousel Ad Formats
Carousel ads are a powerful tool for E-commerce, allowing you to showcase multiple products within a single ad. Each card in the carousel can feature a different product, creating a visually engaging and interactive experience.
- Tell a Story: Arrange the cards to tell a sequential story about your brand or showcase a variety of products that complement each other.
- Highlight Features: Use each card to highlight a specific feature, benefit, or use case of your products.
- Create a Seamless Flow: Ensure a smooth flow from one card to the next, maintaining a cohesive narrative that captures the audience’s attention.
Collection ads take the concept of showcasing multiple products a step further by creating an immersive experience. They feature a primary image or video above, with product thumbnails below.
- Curate Collections: Group related products together to create themed collections that resonate with your target audience.
- Use High-Quality Imagery: Ensure that the primary image or video and product thumbnails are visually appealing and aligned with your brand.
- Optimize for Mobile: Recognize that many users will engage with your collection ads on mobile devices, so optimize visuals and layouts accordingly.
Installing the Facebook Pixel
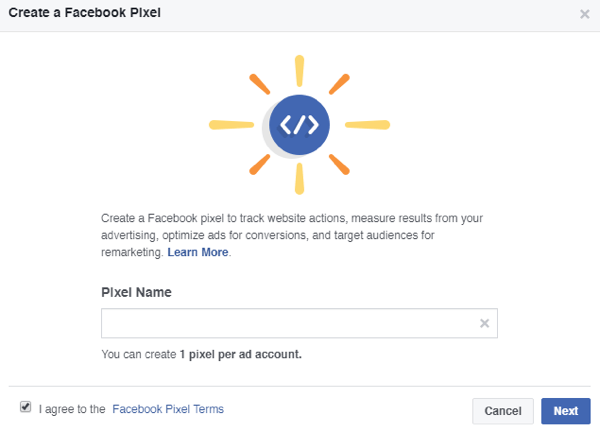
Different Methods to Install the Pixel on Your E-commerce Website
Manual Installation:
Copy and paste: After creating your Pixel in Facebook Business Manager, you’ll get a code snippet. Paste this code into the header of your website. If you’re not tech-savvy, your website’s content management system (CMS) might have a dedicated field for adding scripts.
Using a Tag Manager:
If you’re using Google Tag Manager, you can add the Facebook Pixel without messing with your website’s code. Create a new tag, choose “Facebook Pixel,” and enter your Pixel ID.
Plugin Integration:
Many E-commerce platforms offer plugins or integrations for seamless Pixel installation. For instance, if you’re using Shopify, you can add your Pixel ID in the settings or use a dedicated app.
Verifying Pixel Installation and Troubleshooting Common Issues
After installation, it’s crucial to ensure the Pixel is working correctly. Here’s how:
Facebook Pixel Helper:
Install the Facebook Pixel Helper browser extension. It’ll show a small icon in your browser that turns blue when it detects an active Pixel on a webpage.
Events Manager in Facebook Business Manager:
Check the Events Manager in your Facebook Business Manager. It provides a real-time overview of the events (actions) your Pixel is tracking.
Common Issues:
If the Pixel isn’t working, common issues could include incorrect installation, ad-blockers, or conflicts with other scripts on your website. Check for typos in the Pixel code and ensure it’s placed in the header.
Setting Up Standard Events
Defining and Implementing Standard Events for Tracking Specific Actions
Standard Events are predefined actions that users take on your website. For E-commerce, these could include ‘Purchase,’ ‘Add to Cart,’ or ‘View Content.’ Here’s how to set them up:
Access Events Manager:
In Facebook Business Manager, go to the Events Manager and select your Pixel.
Choose Standard Events:
Click on ‘Aggregated Event Measurement’ and choose the standard events that align with your E-commerce goals.
Customizing Events:
Tailor standard events to match your specific goals. For instance, you can customize the ‘Purchase’ event to include the value of the purchase or currency used.
Implementing Events on Your Website:
Update your website’s code to include the Pixel events. For example, when someone completes a purchase, a piece of code should fire to let Facebook know that a purchase happened.
Customizing Events to Match E-commerce Goals and Objectives
Each E-commerce business is unique. Customizing events allows you to track and optimize for actions that matter most to your business. For example:
If you sell digital products, you might want to track ‘Lead’ events when someone signs up for a free trial.
If you offer a subscription service, tracking ‘Subscription’ events helps optimize ad delivery for users more likely to subscribe.
Here’s a checklist to guide you through the process of setting up an E-commerce campaign on Facebook:
✅ Define Campaign Objectives
✅ Understand Your Target Audience
✅ Create or Verify Business Manager Account
✅ Connect Your Website to Business Manager
✅ Create a Product Catalog
✅ Set Up Dynamic Ads
✅ Install Facebook Pixel
✅ Verify Pixel Installation
✅ Configure Standard Events
✅ Design Compelling Visuals
✅Craft Persuasive Ad Copy
✅ Utilize Carousel or Collection Ads
✅ Define Target Audience
✅Choose Ad Placements
✅ Set Budget and Schedule
✅ Choose Campaign Objective
✅ Ad Set Configuration
✅ Ad Creative and Copy Integration
✅ Monitor Performance in Ads Manager
✅ A/B Testing
✅ Optimize Based on Data
✅ Stay Informed
✅ Regularly Update Product Catalog
✅ Engage with Comments and Messages
In conclusion,
Success in E-commerce advertising on Facebook is a journey, not a destination. By committing to ongoing optimization and staying informed about platform updates, you position your business for sustained growth and relevance. Remember, the world of E-commerce on Facebook is dynamic, and those who adapt and optimize will continue to reap the rewards of a thriving online presence.